

2026 Guide: Shrinky Plastic Printable – Prevent Warping, Ink Smears
By hqt
Popularity aside, Shrinky Plastic Printable can still warp and smear, frustrating even seasoned crafters. Crystal Code’s 2026 guide addresses the root causes, offers practical troubleshooting, and helps you get dependable, professional results project after project.
What Shrinky Plastic Printable Is and Why It Warps
Shrinky Plastic Printable uses a thermoplastic sheet that softens with heat and contracts to a smaller, thicker form. Speed drives the magic, and small errors can escalate into big flaws.
Warping comes from uneven heating – hot spots or quick drafts that curl edges before a uniform shrink. Ink smears when ink sits on the surface, isn’t fully dry, or reactivates with oven heat. In 2026, higher saturation settings look fantastic on paper but overwhelm shrink film.
Crystal Code’s advice is simple: manage heat and manage ink. When both are controlled, the sheet shrinks cleanly, colors pop, and pieces finish flat.
n 2026 Snapshot: Materials and Printers
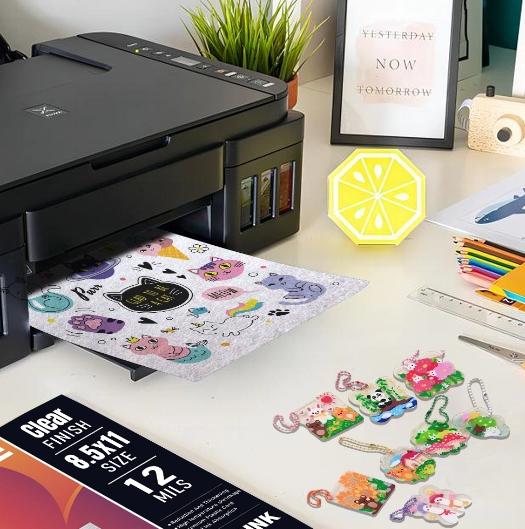
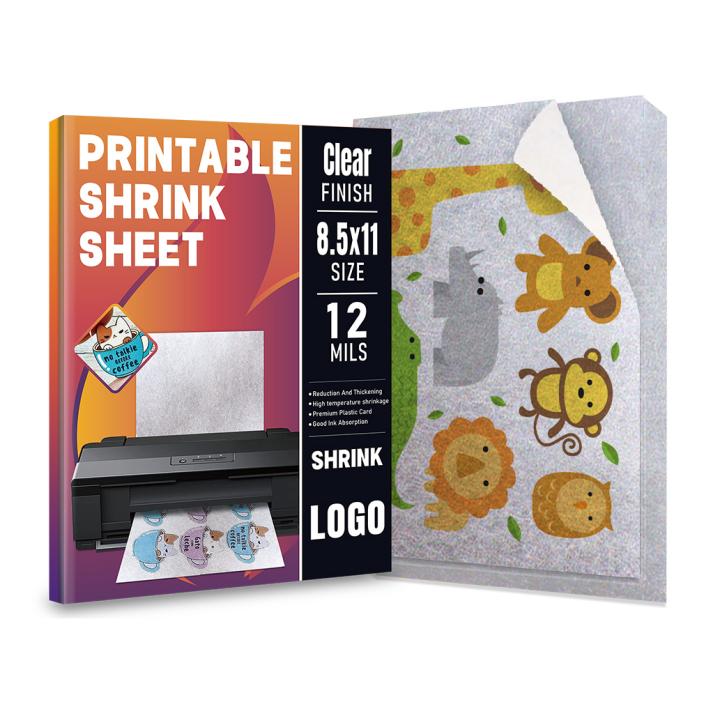
Most Shrinky Plastic Printable sheets are optimized for inkjet. Our Semitron shrinking plastic has two distinct faces: one side frosted (cool to the touch) and the other shiny. Always print on the frosted “cold” side to anchor the ink. Laser printers can overheat and distort the sheet before you reach the oven, so we guide customers to inkjet settings and sealing practices for dependable results.
Crystal Code Material Basics: Print Side, Size, And Shrink Behavior
Crystal Code’s inkjet-printable shrink paper arrives in a handy 11 x 8.5 inch (29.7 x 21 cm) sheet, 0.3 mm thick. After heating, it shrinks to about 20% of its original size and becomes roughly five times thicker. That shrink ratio means a 50 mm design ends near 10 mm, and the final thickness feels strong and premium for jewelry, charms, buttons, tags, bookmarks, and scrapbook accents.
Our Shrinky Plastic Printable is semi-transparent, so colors and patterns layer naturally. Cut edges look smooth and organic instead of harsh, which adds a sense of depth to layered art. For best ink bonding, print on the frosted “cold” side. The shiny side becomes a clean, glossy face post-bake, which many customers love for polished pieces.
The 2026 Guide To Clean Prints: Stop Ink Smears
Ink smears have two root causes: too much wet ink on the surface, or handling the print before the coating bonds the color. In 2026, home printers push more ink than ever in “vivid” modes. That is great for photos, but it can overload specialty films. Here is how to keep it sharp.
• Print on the frosted side. The matte side is engineered to anchor ink. Before loading, make a small corner mark to confirm sides.
• Use a sane print mode. Choose “Matte Photo Paper” or “Plain Paper – High Quality.” Ultra-saturated “Best Photo” modes can flood the surface with ink.
• Avoid edge-to-edge if you can. Full-bleed frames deposit extra ink along borders and can migrate while drying.
• Let it air-dry. Place prints flat in a dust-free area. Give them time to set before touching, cutting, or heating. Rushing invites fingerprints and smears.
• Seal only when needed. Our coating resists smudging, but if you use heavy solids or dark fills, a light, even spray of a clear, fast-dry acrylic sealant can lock pigments before you cut and shrink. Keep coats thin to avoid orange peel.
• Finally, keep hands clean and dry. Oils transfer easily to smooth films. A microfiber cloth is a simple safeguard.
The 2026 Guide to Flat Pieces: Prevent Warping
Warping happens when heat reaches one area faster than another. Edges curl, the center tents, and the piece can freeze in a wavy shape if it cools under stress. You can prevent this with even heat and controlled flattening.
• Preheat your oven or warm your heat tool area so the sheet meets consistent temperature right away. Cold starts create uneven shrink.
• Place the cut piece on a flat, heat-safe liner like parchment or a silicone mat. Avoid textured trays that imprint patterns.
• Expect a temporary curl. During shrinking, pieces twist and curl, then relax. Do not pull them early. Allow them to settle and finish.
• Flatten while warm. Once the piece stops moving, cover it with clean parchment and press with a smooth, flat object (a ceramic tile or acrylic block). Hold until cool for a crisp, flat finish.
• If a piece cools with a slight curve, rewarm briefly and press again. The material is forgiving if you work quickly and evenly.
• Large shapes and long strips need extra care. Add a quick press at the midpoint first, then move to the edges so you do not trap a ripple.
A Simple Workflow That Just Works
Follow this quick path for repeatable results with Shrinky Plastic Printable sheets:
• Design at full page, then scale artwork down visually, remembering your piece will shrink to about 20% of its printed size.
• Mirror text if your final piece will be viewed through the shiny side.
• Load sheets to print on the frosted side; test with a small arrow mark on the corner.
• Set printer to a matte or plain paper mode with high quality, not maximum saturation.
• Print, then let the sheet dry flat until the surface feels set and clean to the touch.
• (Optional) For heavy inks, apply a thin, even clear sealant coat. Let it dry fully.
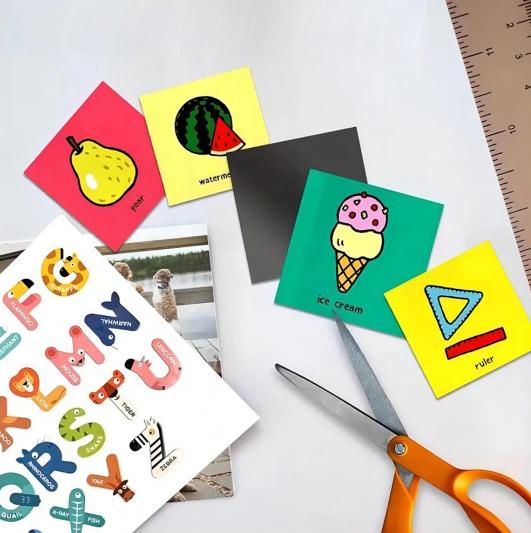
• Cut smoothly with scissors or a craft knife; round sharp corners to reduce stress points.
• Heat on a flat liner. Watch the curl, wait for it to settle, then press flat under parchment until cool.
Troubleshooting and Pro Tips
Even with good habits, questions pop up. Here are fast fixes.
• Edges look jagged after shrinking
Round corners before heating, and cut with clean blades. The five-times thickness after shrinking magnifies small nicks.
• Colors look darker than on screen
Shrinking concentrates color. Lighten designs by 10–15% and raise brightness in your editing app. Do a small test tile before a full run.
• Fine lines look fuzzy
Use solid blacks or 100% spot colors for thin lines. Avoid low-opacity strokes that can break up on porous coatings.
• Piece sticks to the liner
Let the sealant fully dry if you used it. Switch to fresh parchment or a silicone mat. Do not heat on bare metal.
• Surface shows tiny pits
That is often from over-spray sealant or dust. Spray in a clean area with thin coats. Store sheets in their original sleeve to keep lint away.
• Warping returns after cooling
Rewarm briefly and re-press under parchment with a flat tile. Hold until the piece is room temperature before releasing pressure.
Call to Action: Get the 2026 Guide and Samples
Ready to master Shrinky Plastic Printable and prevent warping and ink smears? Contact Crystal Code to request our 2026 printable guide, get sample sheets, or discuss private-label supply for your brand. Our team can explain printer settings, sealing options, and oven workflows tailored to your studio or classroom. Let’s turn your ideas into small, durable works of art – consistently, and with less waste.
- Agodeo inkjet vinyl sticker paper
- AIVA printable vinyl sticker paper
- best inkjet vinyl sticker paper for outdoor use
- cheap printable vinyl sticker paper for outdoor use
- cold chain temperature indicator
- color-change temperature sticker
- Cricut vinyl sticker paper inkjet
- custom vinyl sticker printing
- DIY sticker paper sheets
- durable waterproof sticker paper for inkjet printers
- electronics temperature sticker label
- glossy inkjet vinyl sticker paper
- hot equipment warning sticker
- industrial temperature indicator label
- inkjet sticker paper for Cricut
- matte inkjet sticker paper
- medical temperature indicator sticker
- multi-point irreversible temperature sticker
- Neato vinyl sticker paper
- one-time temperature indicator label
- orajat 1917 printable vinyl
- peak temperature measurement label
- printable vinyl for car decals
- printable vinyl for laptop stickers
- printable vinyl for scrapbooking
- professional quality inkjet vinyl sheets
- reversible temperature monitor label
- self-adhesive printable vinyl
- shipping temperature indicator label
- Tear-resistant sticker paper
- temperature indicator for food safety
- temperature monitoring sticker for transport
- vinyl sticker paper for labels
- waterproof printable vinyl paper
- where to buy inkjet vinyl sticker paper